Understanding of Ins and Outs of Relative path in QTP 11.0
Every Test Automation framework has a well defined folder structure for storing various resources. Sometimes, we are required to copy the complete automation framework from one machine to other machine. Any thoughts how to do this without any glitches? Here comes the concept of relative path to the rescue.
Before diving deep into the relative paths, let us first understand absolute path.
Absolute Path: Also known as full or complete path of a file. An example of absolute path is “C:Trading FrameworkDataMiscTestgif.jpg”
As per the above example, the automation framework resides in the C drive. Now if you share the complete framework wit
h one of your colleague and by mistake, he copies it into his D drive, the absolute path would be “D:Trading FrameworkDataMiscTestgif.jpg”. However, the scripts would fail as they would still search for the automation folder inside C drive. This is the major drawback of absolute path. Hence, care should be taken to make our scripts drive independent. Now we will learn what is relative path in QTP.QuickTest Relative Path: A relative path is the path which is relative to the current working directory.
To understand the concept of relative path better, let us start with an example.
1. Create a test in QTP and save it inside QuickTest’s default location which is C:Program Files HP QuickTest Professional Tests. Lets assume, we save the test having name “DemoTest”.
Navigate to Edit–> Action–> Action Properties to open “Action Properties” window as shown in the below screenshot
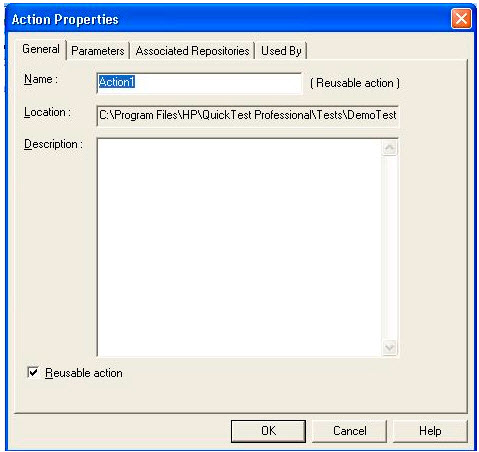
Check “Reusable Action” checkbox, click on the OK button and save the test with these changes. Now this action can be called inside another QTP tests which is why we make it reusable.
2. Create one more test in QTP and save it inside QuickTest’s default location which is C:Program FilesHPQuickTest ProfessionalTests. Lets assume, we save the test with the name “DemoTest1”. Now with the script �DemoTest1� opened in QTP currently, navigate to Insert–> Call to Existing Action to bring up the �Select Action� window as shown in the below screenshot:
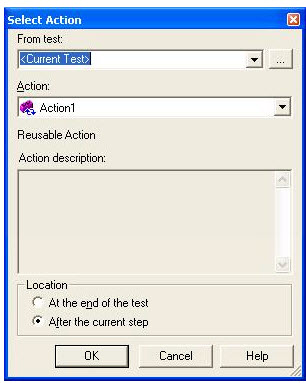
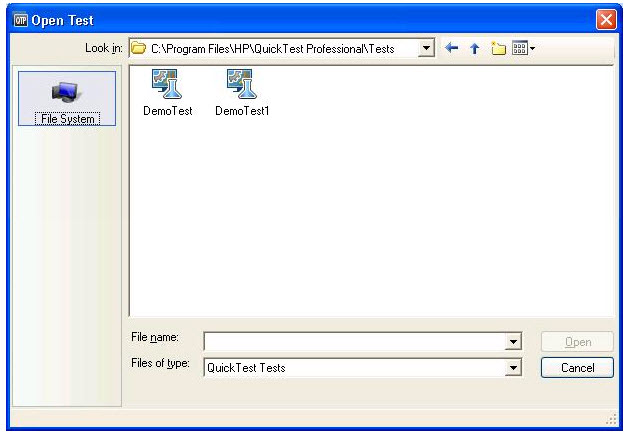
Now, provide the absolute path of the test created in step1 i.e. C:Program FilesHPQuickTest ProfessionalTestsDemoTest inside �From Test� field or you may also click on the �…� button and then select the script �DemoTest� from the �Open Test� window as shown in the below screenshot:
3. We can even specify relative path inside �From Test� field. Using the relative path, if we want to go one folder up, we have to specify �..� and in case we want to navigate to a particular folder, we specify the folder name. Now the Action we want to associate is inside the script which is at the same level as the current test and our current working directory is C:Program FilesHPQuickTest ProfessionalTestsDemoTest1. To go one level up, we will specify �..� and now to go inside the script �DemoTest�, we will specify �..DemoTest� inside the �From Test� field as shown in the following screenshot:
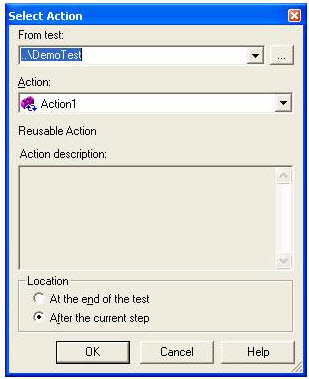
As soon as you will type �..DemoTest� inside the field, the �Action� field will be automatically populated with the reusable action.
4. We just mentioned our current working directory is C:Program FilesHPQuickTest ProfessionalTestsDemoTest1. Now, this is possible only because by default current script�s path is being automatically added under the search list (Tools–>Options and navigate to Folders tab) as shown in the below screenshot:
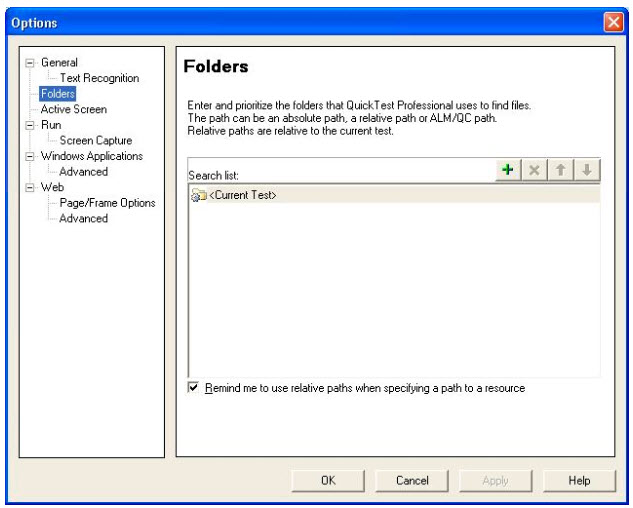
In case of the above example, in order to navigate one folder up, we used �..�. However, in case we need to navigate two folders up, we can use �….�.
Inside the �Select Action� screen, Instead of the relative path, we can even specify the name of the QTP script which contains the reusable action we intend to call inside our script. For that, navigate toTools–>Options and open the Folders tab. Click on the �+� green button which will generate a blank row inside the Search list as shown in the below screenshot:
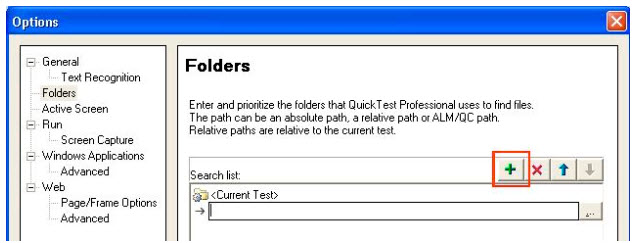
Provide the path where we will store all our scripts which is C:Program FilesHPQuickTest ProfessionalTests and click on the OK button.
Navigate to Edit–>Action–>Action Properties to open “Action Properties” window. This time, instead of specifying the relative path, provide just the name of the QTP script inside �From Test� field as shown in the below screenshot:
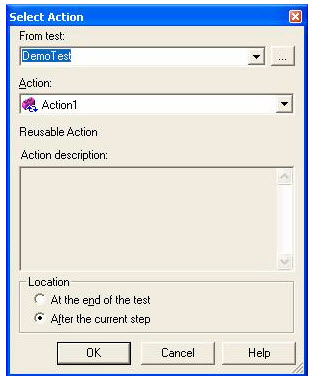
As shown in the above screenshot, the reusable action has been populated.
Note: Relative path can be used in the following places inside QTP:
1. Associated Object Repository
2. External Actions
3. Associated Library Files
4. Search Folders
5. Associated Recovery Scenarios
6. Associated Function Library inside Recovery Scenario wizard
Locating the complete path of a resource specified using Relative path in QTP
It is possible to capture the full path of a resource which has been specified using relative path. The approach is to PathFinder.Locate
From the HP QTP help file,
PathFinder: Enables you to know the file path
Locate: It returns the complete path that Quicktest uses for our specified relative path according to the folders described in the Folders search list( Tools > Options > Folders tab) of the Options dialog box.
The following example uses the Locate method to find the path in which the MyQTPFile.txt file is located.
y=PathFinder.Locate (“MyQTPFile.txt”)
Many More Articles on HP QuickTest Professional

An expert on R&D, Online Training and Publishing. He is M.Tech. (Honours) and is a part of the STG team since inception.
